Click
the
thumbnails
|
 | James Kilpatrick was one of the very few American writers with the courage to tell our story in a major publication. |
 | Executive Officer LCDR Philip Armstrong with chiefs Thompson, Lambert, Benkert and Smith before the attack. Armstrong and Smith died |
 | XO, Lieutenant Commander Armstrong, in his stateroom in happier times well before the attack |
 | Pre-attack reconnaissance. Israel says there was no pre-attack reconnaissance. Any aircraft we saw, they say, were high in the sky carrying troops to the battlefield. Not so. Here is an Israeli reconnaissance airplane that circled the ship about an hour before the attack. The pilot was heard reporting to HQ that he saw an American flag and men sunning themselves on deck. |
 | These are two of the men the pilots must have seen. In the foreground is our Executive Officer, Lieutenant Commander Philip Armstrong. He died soon after this photo was taken. In the background is Lieutenant George Golden, the ship's Engineering Officer. |
 | Captain McGonagle sunbathing about an hour before the attack started. |
 | Manned gun tub before the attack |
 | Israeli torpedo boat during the attack. |
 | Israeli Mystere jet late in the attack. |
 | Battle Dressing Station |
 | Egyptian horse carrier El Quseir (This is what Israel says they thought they were attacking) |
 | Battle damage |
 | Life rafts scorched by napalm |
 | Missile Hole in bridge deck plating |
 | Air ducts exploded from torpedo blast |
 | Battle damage |
 | Battle damage, main deck |
 | Battle damage |
 | Captain McGonagle on bridge next morning |
 | Damaged forward gun tubs |
 | Damaged ladder |
 | Damaged antenna mounts |
 | Damaged antenna mounts |
 | Wounded man in battle dressing station |
 | Wounded man in battle dressing station |
 | Wounded man in battle dressing station |
 | Battle dressing station |
 | Bridge area as seen from helicopter |
 | View from forecastle looking after to superstructure |
 | View looking forward, showing 15 degree list |
 | Napalm damage to signal bag and signal bridge area |
 | View forward from Lieutenant George Golden's stateroom |
 | Rocket holes |
 | Main deck, port side, looking aft |
 | Burned gun tub with USS Davis and TRSSCOMM in background |
 | Rocket holes, port side |
 | Captain McGonagle on deck, resting from his injuries |
 | Battle damage, starboard wing of 02 level |
 | Napalm and fire damage, port side |
 | Medical evacuation flight |
 | Battle and fire damage, signal bridge |
 | Port side looking aft toward TRSSCOMM (moon relay antenna) |
 | Shoring (supports) built to keep flooded compartment from collapsing |
 | Damage Control Officer, Ensign John Scott, examines shoring. |
 | Captain McGonagle on bridge with large missile hole |
 | Captain McGonagle with battle damage visible |
 | Ensign David Lucas with battle damage |
 | Exit hole created by missiles that passed entirely through the ship |
 | USS Liberty listing and battle damaged. They say they thought we were an Egyptian horse carrier |
 | USS Davis approaching |
 | USS Davis arriving |
 | USS Davis alongside |
 | Supplies being transferred during trip to Malta |
 | USS America seen from USS Liberty |
 | Captain McGonagle still on the bridge the next morning |
 | USS Liberty seen from USS America |
 | USS Liberty seen from USS America |
 | Wounded leaving Liberty by helicopter |
 | Wounded leaving Liberty by helicopter |
 | Wounded arriving USS America |
 | Wounded arriving USS America |
 | Wounded arriving USS America |
 | Forward deck house showing rocket holes plugged with rags |
 | Press conference, USS America |
 | LCDR David Lewis with doctor in USS America |
 | Don Herold with doctor in USS America |
 | Lieutenant Commander Dave Lewis was temporarily blinded by the torpedo blast. |
 | Seaman George Wilson in medical evacuation flight from USS America |
 | Memorial ceremony, USS America |
 | Walking wounded attending memorial ceremony |
 | Walking wounded attending memorial ceremony |
 | Memorial ceremony, USS America |
 | USS Liberty arriving at Malta. Her American flag is clearly visible. |
 | Tip of torpedo hole in drydock with scuba divers |
 | Tip of torpedo hole in drydock with scuba divers |
 | The torpedo hole as seen at the waterline. |
 | Torpedo hole as seen from drydock |
 | Torpedo hole covered for security |
 | Torpedo hole in drydock |
 | Torpedo hole as seen from drydock |
 | Torpedo hole, seen from inside while in drydock |
 | Torpedo hole, seen from drydock |
 | Torpedo hole, seen from drydock |
 | Torpedo hole, seen from drydock |
 | Torpedo hole, seen from drydock |
 | USS Liberty seen from USS America |
 | Dr. Kiepfer's stateroom with missile holes |
 | Dr. Kiepfer's stateroom with missile holes |
 | The torpedo hole seen while in drydock at Malta. |
 | The torpedo hole seen from inside while in drydock. |
 | Cleanup inside the torpedoed compartment. |
 | Part of the cleanup crew, resting. |
 | These men didn't come home |
 | Caskets being loaded at Malta |
 | Battle damage on bridge in drydock |
 | Cleanup of torpedoed compartment |
 | Cleanup of torpedoed compartment |
 | Cleanup of torpedoed compartment |
 | Stern view from air upon return to Norfolk |
 | Stern view of the ship, displaying normal steaming colors. This is the flag that Israel claims its pilots and torpedomen could not see. While the attack was underway, an even larger flag was hoisted. That, too, they claim not to have seen. |
 | Return to Norfolk |
 | Return to Norfolk |
 | Welcoming party upon return home. |
 | Joe Lentini visiting ship upon arrival at Little Creek, Virginia |
 | Assault on the Liberty book cover |
 | Congressional Medal of Honor |
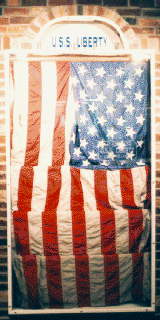
 | USS Liberty Flag as displayed at the National Cryptologic Museum |